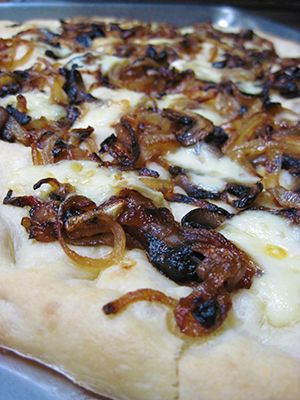
Over the past 2 months, I have been immersed in a crash course on French cuisine, wines, culture and the overall lay of the land in anticipation of my first business trip to France in April.
Many of the menus I have been reviewing include something called a Pissaladière, which is often served for lunch on many of the travel barges that I will be visiting…and very often served with a crisp rosé wine which I love, but not commonly endorsed in the US.
I first saw this made several years ago by Hubert Keller, who is not only a wonderful person but one of my favorite Chefs on TV. His PBS show called Secrets of A Chef aired for a few years, and included an episode called Great Pies of France, where he made a pissaladière.
This little flatbread is actually an homage to the Neapolitan pizza when it comes to the thin crust, but the similarity ends there. It is commonly found in southern France and believed to have been brought to the area by the Romans during the Avignon Papacy. Ideally, the crust should be thin and crispy, almost cracker-like, and the traditional pissaladière does not have any tomato sauce or cheese but more like a white pizza. The name is derived from the ground anchovies called pissala that are a specialty of the coastal area of Nice. The traditional version has the anchovies spread over the dough and topped with caramelized onions, garlic and small nicoise olives. All of these delicious things are cooked beforehand and then placed upon the crust prior to baking.
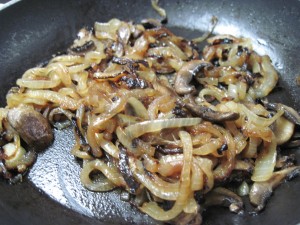
Today, I created a non-traditional pissaladière using a little brie that I had left over. I also added the anchovies to the onions and melted them all together. I did not have the little black nicoise olives, so I added some mushrooms instead and sautéed them together with the onions. If you like your crust softer and chewier, you can add a little olive oil which acts as a dough conditioner and makes it more pliable, but the traditional version is made without it.
It is one of the best flatbreads you can make, and very easy to put together. This would be great as an appetizer for the upcoming Holidays, where you can make a huge tray of it and cut it up into little bite size pieces.
A few important things to remember when working with dry yeast is to ALWAYS add a little sugar to the flour when making the dough. This is an important step because the yeast needs to have some food as it awakens from its slumber while in the dry state, and the sugar provides the food to help it do its job. Adding sugar is not entirely necessary when using fresh yeast since the yeast is alive and ready to go, but I always add a little anyway just to get it going. NEVER add salt or sugar to the yeast directly because it will slow the activity of the yeast and run the risk of killing it altogether. The quantity of water always depends on your environment. If it is dry, you will add a little more than if it is humid or rainy. Lastly,ALWAYS use warm water and not anything else, as this will help in speeding up the proofing of the dough.
If you can respect these few basic principles, you will always have a great result and are well on your way to making your yeast dough!
Traditional Pissaladière
Topping:
2-3 medium onions, finely sliced
4 garlic cloves, finely diced or use a garlic press
4 anchovy fillets
2-4 tablespoons olive oil
S&P to taste
½ cup pitted nicoise olives (you can also use kalamata if you can’t find the small nicoise olives)
Add the oil to a medium sized saute pan and heat it over moderate heat then add the anchovy fillets. Stir these around until melted, then add the sliced onions and garlic and cook until they are well caramelized but not burned. Taste for S&P before adding, especially for salt content since the anchovies are quite salty. Allow this to cool completely before adding to the dough. Add the nicoise olives on top of the dough right before baking.
Dough
2 cups of bread flour (I used all purpose with good results)
1¼ teaspoons rapid rise yeast
1 teaspoons salt
1½ teaspoons sugar
¾ to 1-1/4 cup warm water
1 tablespoon olive oil **optional, for a chewier crust
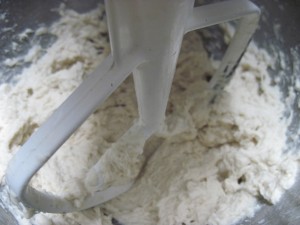
Add the yeast and the warm water to the bowl of your stand mixer and whisk together. Add the flour and then add the sugars and salt. Begin with the ¾ cup of water but then add more if you need to. This is what you are looking for…allow this to rest for 10 minutes with the machine turned off.
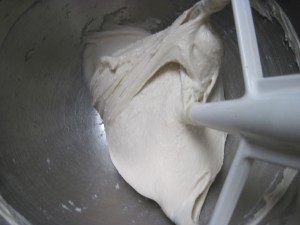
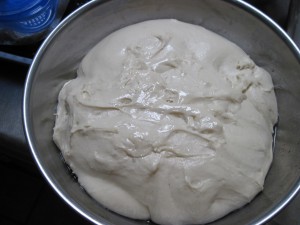
Then, turn the mixer back on and beat this on your mixer for another 15 minutes until you have a soft pliable dough, but not sticky. When you are finished, this is what it should look like. Add this to a lightly oiled bowl and allow to rise in a warm place until double for 1- 1 ½ hours.
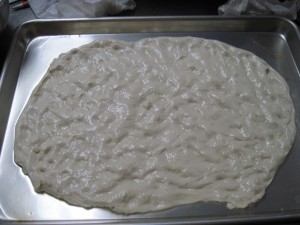
When your dough is almost ready, preheat your oven to 400°F. Using a half sheet pan, add a little more oil and use your fingers to coat the entire inside of the sheet pan. Add the proofed dough to the sheet pan, and stretch it out by gently poking the dough. It should fill the entire pan.
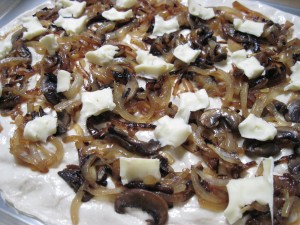
Top this off with the cooled filling, leaving a 1” edge all around as a border.
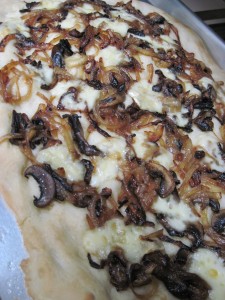
Bake this for approximately 20 minutes until the crust around the edges is golden brown. The bottom should also be a nice golden brown color, so move the tray to the bottom rack of the oven if you need to. Allow to completely cool and use a pizza cutter to slice into large wedges or appetizer size pieces.
Leave a Reply