 If you are a baker, then you know what kind of dessert I am talking about when I say the word cobbler. For those of you who don’t know, let me just say that (traditionally speaking) a cobbler consists of either a fruit or savory filling that is poured into a dish, topped with scoops of thick batter or cut rounds of either biscuit or scone dough and then baked. This definition would definitely apply if you were in the UK where the cobbler originated, but if you live in the USA you will discover several other variations.
Cobbler recipes in the American South may resemble a thick-crusted, deep-dish pie and others in the Midwest involve cake batter that is poured into the dish first, then topped with a fruit filling before it’s baked.
The truth is that there are several different interpretations of the dessert, and what ultimately shows up in your bowl greatly depends on where you are in the world.
Cobblers originated in the early British American colonies where English settlers, unable to source ingredients to make their traditional suet puddings, settled on making a precooked stewed filling that was poured into a dish and topped with plain biscuit, scones or dumpling dough that they fit together on top.
The origin of the name is uncertain, and many believe that it is attributed to the cobblestone look on top of the dessert. It may also be related to the now archaic word cobeler, which means wooden bowl. Using large wooden bowls to make biscuits was common early on, and still used today. These bowls were large and shallow enough to easily combine all of the ingredients without spilling them, and also allowed for the sweeping motion required to combine the ingredients. If used regularly, the wooden bowls did not require washing. Any remaining dough was easily scraped out and the bowl was wiped clean, easily readied for the next batch.
Grunts and slumps are the New England and Canadian versions of what we know as a cobbler. The difference was that the filling was typically cooked on the stove top in cast iron skillets. The biscuits were placed over the thickened filling, covered and steamed under the lid. These reportedly take their name from the grunting sound made by the filling as it bubbles under the dough.
This recipe is absolutely delicious and comes together so quickly. I love using berries in my desserts, but because they contain SO much water, I have discovered that by cooking down half of the fruit to a jam like consistency, then adding in the other berries fresh, it gives you the perfect thickness to the filling. I don’t like to use cornstarch, and preparing it this way allows you to omit it altogether.
The good thing about blueberries is that they have a good bit of pectin in them, so once cooked, they thicken very quickly. If you don’t like blueberries, you can use other types of berries instead — just make sure to do the same thing. Those that require some added thickeners will benefit from the addition of a few tablespoons of cornstarch or some shredded apple, which has a good amount of pectin — we don’t want to turn your berry dessert into an apple dessert, but if you are like me and don’t like adding cornstarch, a little apple will go a long way. The problem with most berries is that if you don’t cook part of the quantity you are using, the filling will be very watery and will remain so in the baking process. If you choose to use a firmer dough, you run the risk of the cobbler not baking through, especially underneath — so cooking some of them is very important when using juice filled berries. I found that this is not the case with peaches, nectarines, apricots or apples, so no precooking necessary when using those fruits.
The biscuit on top is delicately sweet and very buttery. Scoop it out while it’s still a little warm and top it with a scoop of ice cream or a dollop of lightly sweetened whipped cream or plain Greek yogurt — I actually prefer the yogurt. To this day, it’s still one of the most popular, comfort food desserts that people rely on, because it’s so easy and delicious.
Blueberry Cobbler
Filling
4 pints fresh blueberries
1 cup granulated sugar **extra ½ cup can be added, but I usually don’t use it
Juice of 1 lemon
Cobbler Dough
1 ¼ cups flour (for a firmer biscuit type dough use, 1½cups flour)
zest of 1 lemon
1 stick cold salted butter
1/2 cup sugar
1 cup buttermilk
1 teaspoon BS
1/2 teaspoon BP
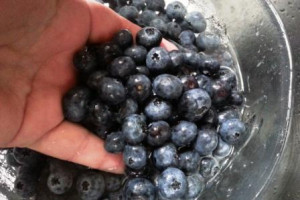
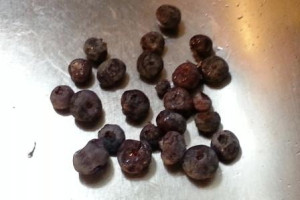
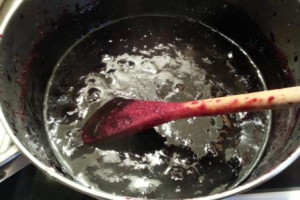
The first thing you need to do, is wash your lemon, zest it and then juice it. Keep the zest on a small plate on the side because you will need this for the cobbler dough and the juice will be added to the blueberries. Empty out 2 pints of blueberries into a small bowl and rinse them well. Remove any visible stems or any moldy or mush berries then drain in a colander. Place the cleaned berries in a small stock pot, add 1 cup of sugar and the juice of your lemon. Cook this until the berries have thickened like a jam, then set this aside to cool.
Clean the other 2 pints of blueberries in the same way, then drain them. Add these to your cooked blueberries, and depending on how sweet they are, you can add the extra ½ cup of sugar. Mix this together well and you will see some juice leach out of the mixture, this is OK and will thicken in the oven. Pour the blueberry mixture into your well greased dish and set it aside while you begin to make your cobbler dough/batter.
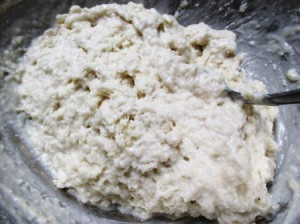
The recipe I have provided can be made into either a firmer dough to bake as a traditional cobbler biscuit on top of the filling, or you can make it just a little thinner as more of a batter. I have made it both ways and they are both delicious, it really just depends on what mood I’m in. I find that most times I prefer to make the batter because it bakes more like a cake-y biscuit — but again, it is strictly up to you. For a thinner batter like topping I only add 1 ¼ cups flour, and for a more firmer biscuit like topping, I add 1½ cups flour. So it is easy to regulate.
You either get more of a batter, like this…
Or a firmer biscuit dough texture like this…
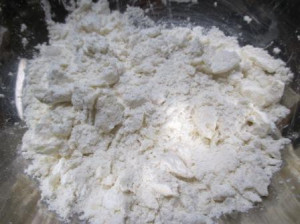
Add the (desired) quantity of flour (depending on whether you want a batter or a biscuit type of topping) to a medium sized bowl and use a knife to cut the cold butter over the flour. Add the baking powder and the baking soda to the flour and use your hands or a pastry cutter to cut the butter into the flour. The final result should look like very coarse meal with lumps of butter visible throughout. Add the (extra) sugar if you like, lemon zest and buttermilk and mix well with a spoon until no flour is visible.
Spoon this over your prepared filling and bake in a pre-heated 350°F oven until the top is golden brown all over, about 20-30 minutes. Remove from the oven and allow the cobbler to cool slightly before serving. This part is important because it helps to thicken the filling to make it easier to spoon out, and the cooler cobbler won’t melt the ice cream or other topping you choose to use.






Leave a Reply